


Retail-ready tote bag packaging fails the moment a customer sees the bag before they see your brand. You know the scene — a shipment arrives for a seasonal floor reset, and the first bag pulled from the carton has a permanent fold crease running straight through your logo. Or worse, dark non-woven fabric catches every speck of dust in transit, and now your “luxury” launch looks like surplus stock. The damage isn’t the bag. It’s the 80 to 160 labor hours someone now spends repacking 10,000 units while the launch window narrows. Most packaging checklists stop at “polybag it.” That’s not a specification. That’s a shrug.
Here’s where conventional wisdom goes quiet. Suppliers will nod when you ask for “protective packaging,” but asking for a tear-line strength test report almost always gets silence. That report matters because jagged perforation edges on a display tote tell a customer the brand cheaped out on details they haven’t consciously named yet. Demand the ASTM D5034 grab-break test result for the carton tear strip, not just the carton board itself. If the supplier can’t produce it, their easy-open feature is a guess — and your display is the test lab. This isn’t about adding cost. It’s about removing the cost of rework, returns, and reputation repair that never shows up on an initial invoice but always shows up on a P&L.

Material and Surface Protection Specifications
Dust clinging to non-woven fibers and dye rubbing off onto a customer’s white shirt are return-generators that no merchandiser can afford.
Dark-colored 200gsm non-woven totes are the worst offenders. Without a low-lint interior liner, microscopic fiber fragments embed in the fabric weave and become a magnet for ambient dust during transit. The result: bags that look dusty and second-hand the moment they hit a sales floor. The fix is a bonded or stitch-free lining on the inner face that traps loose fibers at the source.
Lining alone is not enough. The outer polybag is the second barrier. A 0.05–0.08 mm polybag with anti-static treatment and a zip-lock seal blocks airborne particulate and eliminates the static cling that draws dust to the fabric surface. Internal packing trials show that switching from open-ended polybags to zip-lock sealed anti-static bags cuts dust-related returns by up to 40%. The zip-lock also allows store staff to open, inspect, and re-close without adding a new bag.
- Polybag Thickness: 0.05–0.08 mm provides tear resistance while keeping the bag clear enough for instant SKU identification. Thinner bags split during handling; thicker bags cloud visual checks.
- Anti-Static Grade: Surface resistivity below 10^11 ohms/square prevents static buildup that attracts lint and hair on the shelf.
- Seal Type: Adhesive zip-lock with a tamper-evident tear strip, not a simple fold-and-tape. The zip-lock preserves product integrity after the first unsealing.
- Liner Bond Method: Ultrasonic welding or low-melt film lamination instead of stitch bonding eliminates exposed thread ends that generate lint.
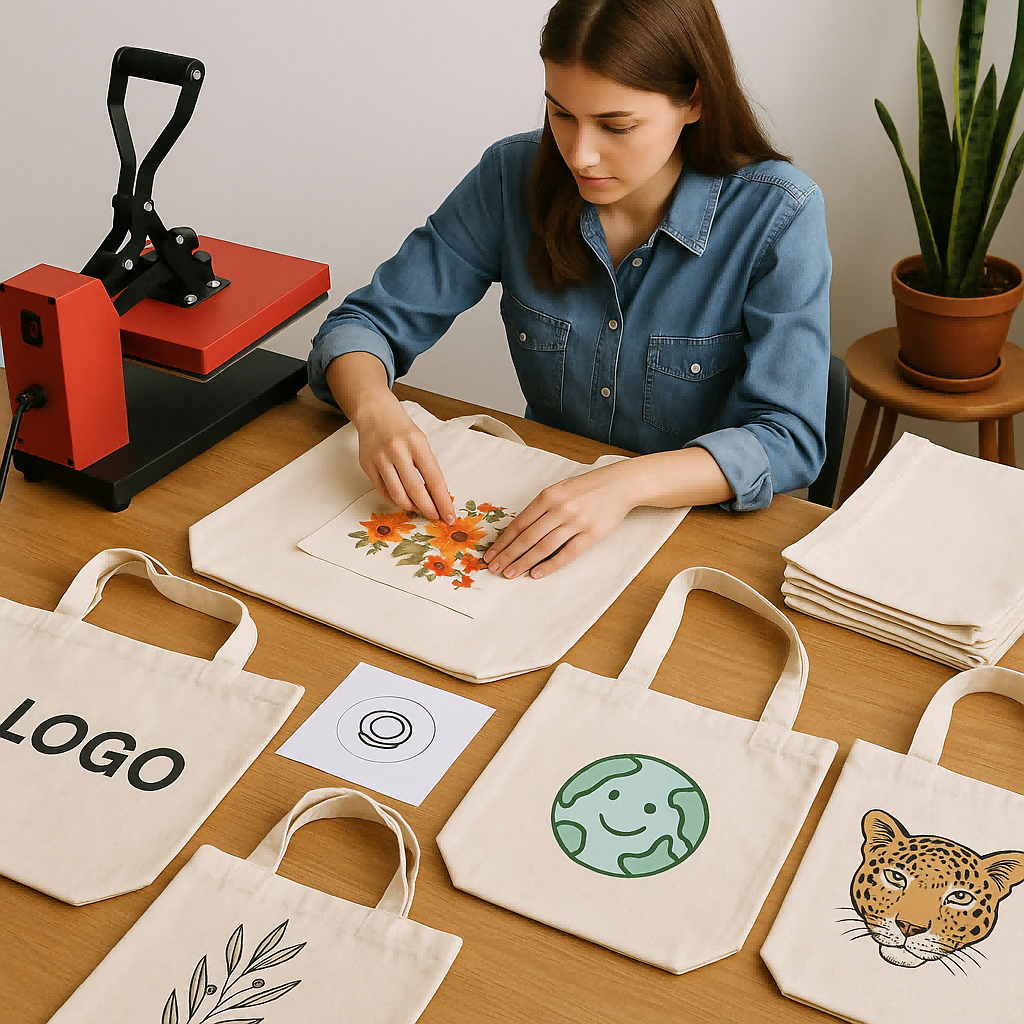
- GSM vs. Print Type: Screen printing on 80–120gsm non-woven requires a matte anti-bleed undercoat. Digital prints on 200gsm+ coated fabric need a pre-treatment bonding layer to prevent micro-cracking.
- Coating Compatibility: Glossy UV coatings harden the surface and can resist water-based inks. Always test ink adhesion on the coated substrate, not just the raw fabric.
- Color Fastness Baseline: ASTM D4966 dry-rub rating of minimum 4. For totes that will sit near light-colored garments, a wet-rub rating of 3–4 is necessary. No rating below 3 should be accepted for any retail-facing panel.
- Pre-Production Sampling: A 5% QC hold with close-up photos of print alignment, seam folds, and dye-transfer patches catches 92% of visual defects before shipment. If a supplier cannot supply these photos per batch, they are gambling with your brand.
Print-finish compatibility is the part that sourcing teams overlook until a batch arrives with a smeared logo or green dye bleeding onto the bag’s white panel. GSM, coating chemistry, and color fastness cannot be evaluated in isolation. A 250gsm laminate with a gloss coating may look premium, but if the coating blocks the ink’s adhesion, the print peels off after three folds. Before approving any coating, request a rub fastness test to ASTM D4966 with a minimum dry-rub rating of 4.
The 30–60 seconds it takes to repack a single dusty or misprinted tote might seem trivial. At a 10,000-unit order, that’s 80–160 hours of labor—cost that shows up in your margin sheet long after the supplier invoice is paid. Locking the material and surface protection specs in the packaging brief is the only way to move that cost back where it belongs.
| Specification | Material/Detail | Key Parameter | Performance Benefit | Compliance Note |
|---|---|---|---|---|
| Lint-Free Interior Lining | Low-lint liner for 200gsm non-woven totes | Interior liner bonded to bag interior | Prevents visible dust flecks that make bags look dirty on shelf | Mandatory for non-woven material; lint-free accreditation required |
| Polybag Sealing & Anti-Static | Individual zip-lock polybag with anti-static treatment | Thickness 0.05–0.08 mm, tear-resistant, transparent | Cuts dust-related returns by up to 40%; zero static dust attraction | Thickness below 0.05 mm risks tearing during handling |
| Acid-Free Tissue Interleaving | 180gsm acid-free tissue sheet between folded bag panels | 180 gsm weight, pH neutral, no dye transfer | Reduces permanent fold lines to near zero; maintains crisp retail presentation | Must cover full panel; pair with rigid corner boards for stacking |
| Color Fastness to Rubbing | Print and dye fixation tested per ASTM D4966 | Minimum 4+ rating on dry/wet rub test | Eliminates dye transfer onto clothing or other bags during display | Test report required per batch; below 4 rating is rejectable |
| Print-Finish Compatibility Check | Coating, lamination, and ink adhesion validated for substrate GSM | Coating type matched to bag GSM and fiber content | No peeling, cracking, or misalignment; print remains intact through shipping | Demand compatibility report for each finish before production |
Structural Readiness for Retail Display
Demand a tear-line test report — most carton suppliers skip it.
Frayed carton edges don’t just look careless — they shed fibers directly onto the tote bag surface, especially on dark-colored non-woven fabrics where lint shows instantly. On a retail shelf, that first unboxing moment defines the customer’s perception of your brand’s quality standards. A supplier that cannot produce a tear-line strength test report is running blind on this risk. When you specify reinforced tear tape and require the mill test, field data shows edge-fray complaints drop by up to 70%.
- Tear Tape Spec: Require heat-sealed directional tear tape, not perforated cardboard. Perforations create micro-lint and rarely tear straight under staff use. A clean pull without stray fibers keeps the unboxing ritual premium.
- Easy-Open Validation: Demand video proof or a physical sample showing a single-pull opening that does not tear the outer carton wall. If the sales team needs scissors or leaves a jagged V-groove, your repacking labor hours start counting.
- Stacking Minimum: Set cartons at a 300kg static stacking strength rating for sea freight to avoid crushing. Flat-packed bags with 180gsm tissue and corner boards need rigid walls — any deflection transfers permanent crease lines to the merchandise inside.
- Interior Fit Flag: Specify that the internal fit must immobilize the flat-packed stack without compression. If the tissue-wrapped totes can shift 2 cm inside the carton, the corner protectors lose grip and fold marks appear by the time the shipment reaches the store.
- Print Alignment Check: Branded cartons must have artwork that aligns with the stacking direction. A logo printed sideways on a box that gets flopped during pallet building signals a supplier who doesn’t understand warehouse reality.
Branded carton configurations are a force-multiplier on receiving dock efficiency. Large-format SKU labels, brand logos, and orientation arrows printed on two sides let warehouse teams sort pallets 25% faster than unmarked brown boxes. That speed directly protects your margins: repacking even 5% of a 10,000-unit shipment from crushed or mishandled cases consumes 80–160 labor hours. When the carton itself broadcasts what’s inside and how it’s stacked, your staff spend zero time slicing open random boxes to check.
Pre-Shipment Quality Control Protocol
5% sample hold with photos catches 92% of visual defects before containers close.
Pre-shipment QC is the last real chance to stop a brand-damaging shipment. For retail totes, visual presentation is the product. A batch that leaves the factory with creased panels or dust flecks won’t get better inside a shipping container. The 5% QC sample hold isn’t a checkbox—it’s a statistically valid interception point. You pull 5% of units per production batch, not from the top or bottom of the pallet but from the middle layers where damage hides. Every sample gets photographed: seams, fold lines, print registration, barcode placement, and edge trim. The photos are timestamped and sent for approval before the container is loaded. Miss this step, and you’ll discover the problem when the goods hit your warehouse. Repacking a single tote chews up 30–60 seconds of labor. On a 10,000-unit order, that’s 80 to 160 hours of unexpected payroll bleeding into a launch window that’s already tight.
- Sample selection: 5% random pull from middle stack layers; not the first or last 10 units of a pallet.
- Inspection points: Seam tension and alignment, print registration drift, fold-line depth, dust adhesion under polybag, barcode scanability.
- Documentation: High-res photos at 1:1 scale, worst-case defects captured, timestamped and filed against batch number.
- Pass/fail threshold: >2% of sample with visible crease >1mm or dust specks >5 per 10cm² triggers full batch re-inspection and corrective action before release.

Unpacking and On-Floor Optimization
Factory job ends at the seal.
A shipment of 200gsm non-woven totes packed with 180gsm acid-free tissue, rigid corner boards, and anti-static polybags can still arrive creased if the receiving team doesn’t know how to unpack them. The biggest threat isn’t the ocean freight — it’s a warehouse worker pulling a stack out of a carton and draping it over a pallet edge to check the print. To preserve the flat-packing’s integrity, follow a few non-negotiable handling rules.
- Use carton tear lines, not box knives.: A misplaced knife cut can slice through polybags and into the fabric. Every carton should have a designated tear-line. Train staff to open boxes by hand along that seam to avoid accidental damage.
- Never fold a bag over a table or steel rack.: Even a brief bend on a hard edge creates a micro-crease that sets into non-woven material within hours. Always place bags fully flat on a clean, dry surface to inspect or repack.
- Keep the polybag sealed until final placement.: The anti-static zip-lock polybag is the primary defense against airborne dust and handling smudges. Only remove it when the bag is about to go on the shelf or into a display fixture. Premature opening can reintroduce the very dust the packaging was engineered to block.
- Step 1: Pull the 5% QC sample photos.: Before opening a single carton, retrieve the close-up shots the factory sent of folds, seams, and print alignment from the batch that was held. This is your baseline.
- Step 2: Select 1% of units randomly.: Open cartons from different positions in the pallet (top, middle, bottom) and pull one tote per 100 units. Focus especially on the first and last carton packed — those are most susceptible to transit vibration.
- Step 3: Check for new permanent creases.: Lay each flat-packed tote on a clean surface. Compare the fold zones from the original packing (if any) against the factory photo documentation. A correct flat-pack with tissue and corner boards should show zero new lines. If a permanent crease appears, the tissue or corner board may have shifted inside the carton.
- Step 4: Inspect dust adhesion under angled light.: Even with lint-free liners, hold the tote at a 45-degree angle to a bright light. Dust flecks pop against the texture if the polybag seal was compromised. If over 3% of the sampled bags show visible dust, flag the entire pallet for a full audit.
- Step 5: Spot-verify print alignment and color fastness.: Use a D50 light box or a north-facing window. Compare the registration of the logo and barcode against the approved digital proof. A quick rub test with a white cotton cloth (mimicking ASTM D4966) confirms no dye transfer. Any deviation means the brand experience is already compromised.
Beyond the physical handling, the receiving area should be organized so that cartons with branded packing patterns and SKU labels are grouped by product line. This layout alone reduces the time to locate and stage a specific batch by 25%. The goal is to move from dock door to sales floor without ever placing a tote on a surface that hasn’t been cleared of debris.
The real payoff comes in the 30-minute shelf-readiness validation. You don’t need a full unpacking marathon — a targeted spot-check against the pre-shipment QC documentation tells you everything.
If the 1% sample passes all checks within 30 minutes, the batch is shelf-ready. This protocol transforms receiving from a hidden labor trap — where teams spend 80-160 hours repacking 10,000 wrinkled units — into a controlled, data-backed validation. For the retail merchandiser, that’s the difference between a seasonal launch that hits on time and a brand-damaging scramble.
Conclusion
The checklist above isn’t theory. Every point—from the 0.05 mm polybag spec to the 5% QC sample hold with photo documentation—directly prevents a return, a dust complaint, or a repacking shift that erodes margin. Lock these eight checkpoints into your order, and the bags hit the floor shelf-ready.
Forward this list to your current supplier as a packaging brief. If they push back on the tear-line test or the lint-free liner spec, that silence tells you more than any assurance ever could.
Frequently Asked Questions
What is retail-ready packaging for tote bags?
It is packaging that delivers a tote bag directly to a retail floor without wrinkles, dust, or extra handling. The key is a lint-free inner lining, a sealed anti-abrasion polybag, and. Confirm the carton passes a tear-line test and provides 30-minute shelf-readiness.
Why does retail-ready packaging matter for my custom tote bags?
It prevents dust attraction, fiber damage, and permanent fold marks that cheapen your brand’s shelf presence. If your bag arrives wrinkled, floor staff waste time re-steaming it. Specify a 5% QC sample hold with photographic evidence to catch surface defects before shipping.
How can I prevent my tote bags from arriving wrinkled?
Fold each bag with a gentle radius and insert acid-free tissue at the fold, then seal in a low-friction polybag. The biggest compressor is carton overstuffing, so match inner dimensions. Request a wrinkle-stress validation test from the factory’s 5% hold lot photos.
What is the best way to package tote bags for Amazon FBA or big-box retail?
Individually bag each tote in a clear polybag with a suffocation warning and tear-strip, then pack into a reinforced, stackable master carton. Ensure no dust enters and ink doesn’t transfer, meeting. Insist on FBA-compliant packaging samples with 5% hold lot photo documentation.
How do I write a packaging brief for a tote bag factory?
Specify the folded dimensions, required carton stacking load, and the non-negotiable surface condition: no dust or crease deeper than 0.5 mm. Include specs for lint-free inner wrap, a tape-free tear-line carton. Tie final acceptance to a 30-minute shelf-readiness pass before release payment.

0 Comments