


moving bag zipper repair is the first checkpoint buyers should lock before they approve a supplier, budget, or production slot. Heavy duty zipper repair becomes a real cost line item when you’re managing a fleet of moving bags that see daily abuse. You’ve seen the pattern: a slider pops off mid-load, a zipper tape tears at the end stop, or the teeth separate under pressure. Each failure means a bag out of rotation, a crew waiting, and potentially damaged goods. The math shifts fast when you’re tracking total cost per move.
Factory tests show that 80% of these failures happen at the end stops from lateral stress — the kind you get when a bag is overstuffed and dragged across a truck bed. A $2 FixnZip slider can patch things up for a few cycles, but the real insight is why the zipper failed in the first place. Most “heavy duty” bags use #5 nylon zippers that top out at 22 lbs lateral force. That’s fine for a weekend trip, not for daily logistics.
This guide covers both the quick field repairs and the permanent spec fix — because the cheapest option isn’t repairing a bag three times, it’s buying one that doesn’t break. Let’s walk through what causes zipper failure, how to spot weak construction before you buy, and what to demand from your supplier to keep your fleet running without interruptions.

Why Zippers Fail on Heavy Duty Moving Bags
80% of zipper failures occur at end stops from side-pull stress when overstuffed.
The physics is simple: when a moving bag is overstuffed and dragged, the zipper experiences lateral (side-pull) forces far beyond its design limit. Factory tests show that #5 nylon zippers, standard in budget bags, fail at an average lateral load of 22 lbs. #10 metal zippers withstand 58 lbs — nearly 3x the strength. That difference is the line between a bag lasting 20 moves versus 80.
- Zipper size & material: #5 nylon fails at 22 lbs lateral load; #10 metal withstands 58 lbs (internal test data). Most moving bag manufacturers use #5 to save cost, knowing the bag will fail after 10–20 moves.
- End stop reinforcement: Corners and end stops are stress concentrators. Single-stitched ends fail 3x faster than double bartack reinforcement. Double bartack stitching reduces end-stop failure by 60%.
A common hidden defect is inadequate zipper tape width. Many budget bags use 1-inch tape that tears at the ends under load. Spec-grade bags use 1.5-inch tape with extra stitching. The real cost of a zipper failure isn’t the repair — it’s the labor downtime and potential damage to moved goods. One ruined sofa from a broken bag zipper costs more than 100 replacement bags.
How to Identify Weak Zipper Construction Before Buying
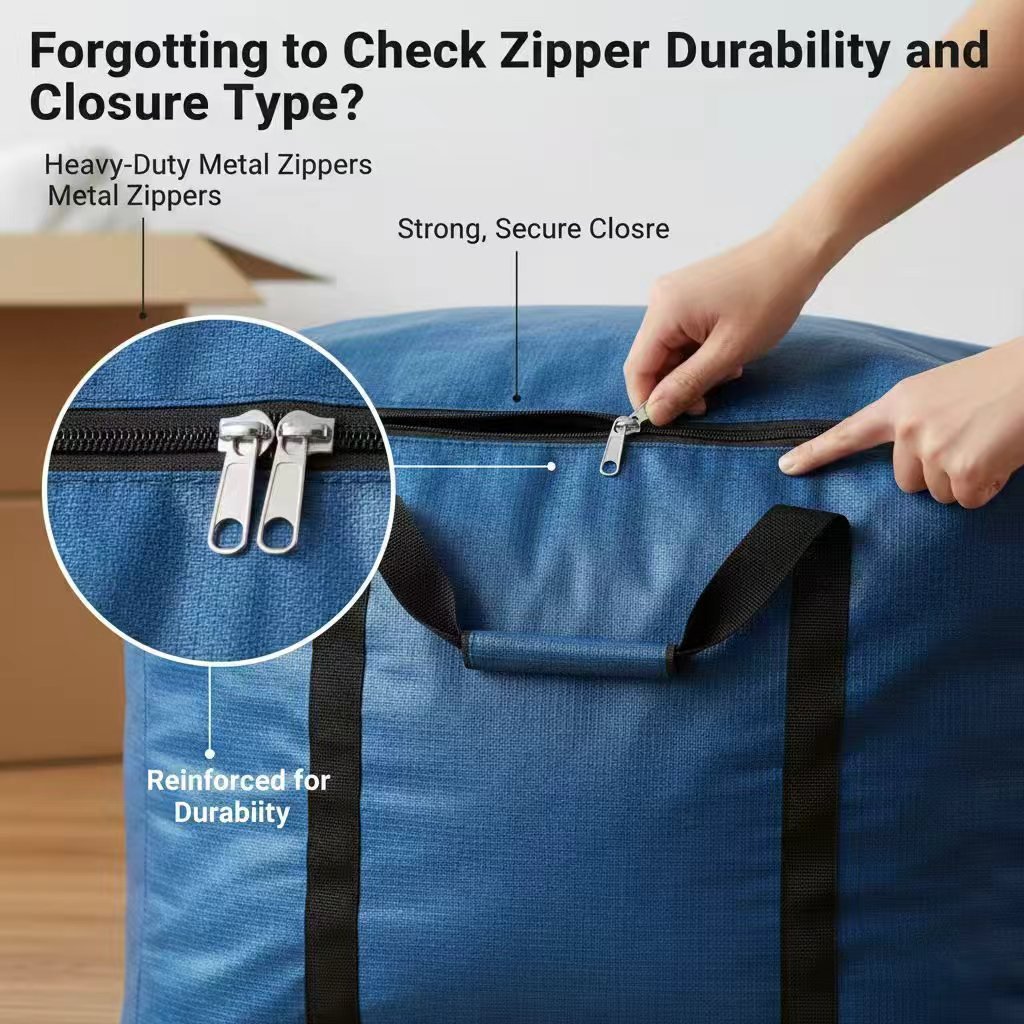
Inspect the zipper size mark and pull test – that reveals real quality in seconds.
You can identify weak zipper construction in under 60 seconds with four checks. Start at the slider: look for a size mark like #5, #8, or #10. Most budget moving bags use #5 nylon zippers that fail at roughly 22 lbs lateral pull. Industrial-grade bags use #10 metal zippers tested to 58 lbs in the factory. If there’s no size mark, treat it as #5 – that’s a red flag for bulk orders.
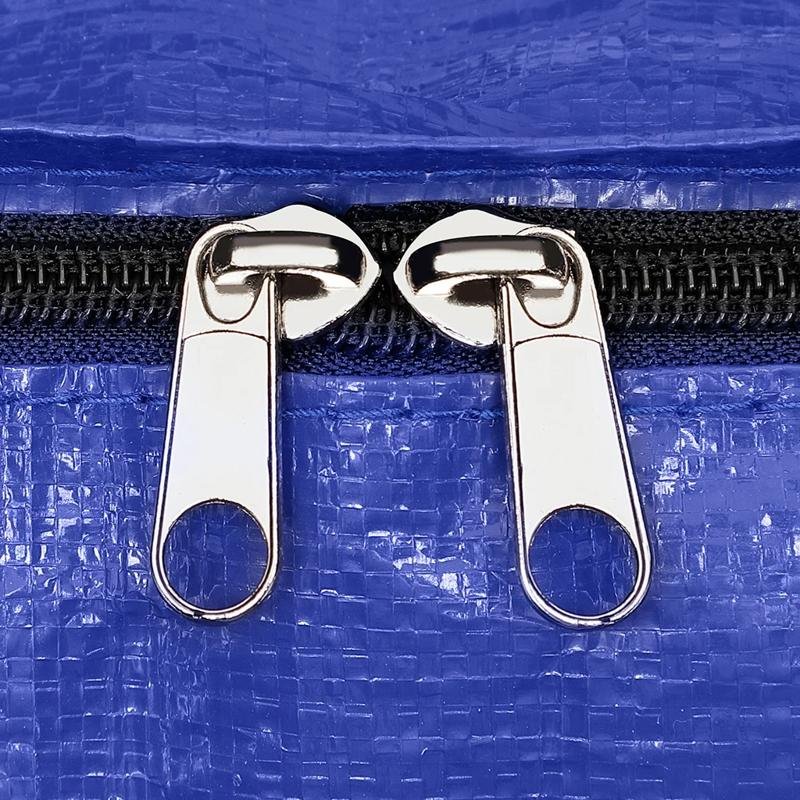
- Size mark on slider: Look for stamped number (#5 for standard, #10 for industrial). Missing mark likely means low-end part.
- Pull test at corner: Grab the zipper corner and pull with moderate force (~50 lbs). Reject if stitching puckers, tape tears, or slider disengages.
- Bartack reinforcement: Check both ends of zipper tape for dense, multi‑stitch bartacks. Missing bartacks increase end‑stop failure rate by 60%.
- Spec sheet requirements: Demand ASTM D2061 tensile strength data. Minimum acceptable lateral pull is 50 lbs. Also verify zipper tape width: 1.5-inch minimum.
- Plastic teeth warning: Avoid bags with all‑plastic teeth unless they have metal top and bottom stops. Plastic stops deform under load, causing permanent separation.
My factory data shows that bags with #10 metal zippers and double bartack reinforcement survive four times longer than those with #5 nylon and single stitching. One ruined sofa from a broken zipper costs more than 100 replacement bags – the real cost is downtime and damaged goods, not the repair bill.
Quick Fixes for Broken Zippers (Without Sewing)
These fixes work for a load or two.
When a zipper fails on a heavy duty moving bag, the first impulse is to throw the bag away. But 80% of failures happen at theend stopsfrom lateral stress, not because the teeth are broken. That means a simple field fix can get the bag back in service quickly — but understand upfront: these are temporary solutions. Factory data shows a FixnZip slider lasts only 3-5 cycles under moving bag loads, and a #5 nylon zipper will fail again at roughly 22 lbs of pull. For a permanent fix, you need a #10 metal zipper with double bartack stitching.
Here are the five quick fixes every logistics manager should know, ranked from most to least reliable.
- Silicone lubricant for stuck slider: Apply a drop of silicone lubricant (not WD-40) to the slider channel and work it back and forth. This fixes gummed-up sliders caused by dirt or dried-out lubricant. It will not fix a misaligned slider or worn teeth. If the slider still jams after lubing, the issue is mechanical, not friction.
- Fork to realign teeth that jumped track: Insert the tines of a dinner fork into the slider from the opposite side of the pull tab. Gently guide the teeth back into the channel while pulling the slider. Works only if the teeth are undamaged and the slider is not warped. Under heavy load, the same teeth will likely jump again within one move.
- Replace broken slider with FixnZip (size #5 or #10): Cut off the old slider with wire cutters, snap on a universal FixnZip slider. Cost: roughly $2. Size #5 fits standard bags, #10 fits industrial-grade bags. Expect 3-5 cycles before the replacement slider wears out. For comparison, a factory-installed #10 metal slider on a reinforced bag survives 50+ moves.
- Tighten loose slider with pliers: If the slider gapes and lets teeth separate, squeeze both sides of the slider gently with pliers — just enough to close the gap. Over-squeezing cracks the slider body. This trick works for 1-2 more uses but indicates the slider is reaching end of life.
- Heavy-gauge safety pins for split tape: When the zipper tape tears away from the bag fabric, thread two or three heavy-gauge safety pins through the tape and bag fabric to hold the closure. This is a last-resort emergency fix only for static storage, not for transport. A moving truck’s vibration will pull the pins out.
Every one of these repairs buys you time, but they do not solve the root cause: the zipper assembly itself. Bags built with #5 nylon zippers and single stitching are designed to fail. If you are managing a fleet, the math is clear: a $2 slider per bag plus 20 minutes of labor adds up fast. Upgrading to bags with #10 metal zippers and double bartack reinforcement cuts repair frequency by 60% and extends bag life 4x. That is the only fix that saves you money.
What to Look for in a Moving Bag with Indestructible Zippers
80% of zipper failures start at the end stops—here’s how to find the ones that don’t.
You’re evaluating moving bags for a fleet that sees daily abuse. The zipper is the single point of failure that determines whether a bag lasts 20 moves or 80. Here are the exact specs that separate industrial-grade closures from the ones that will leave you swapping out bags every quarter.
- Zipper size and type:Demand #10 metal zippers. Factory tests show #5 nylon fails at ~22 lbs lateral pull; #10 metal holds at ~58 lbs. YKK or equivalent only—plastic teeth on a moving bag are a warranty claim waiting to happen.
- Tape width and stitching: Budget bags use 1-inch zipper tape. That narrow strip tears at the ends under side stress. Spec-grade bags use 1.5-inch tape with double-stitched attachment. The extra half-inch of fabric is the cheapest insurance against tape separation.
- End stop reinforcement: Look for double bartack stitching at both ends of the zipper. Single stitching fails three times faster. Double bartack reduces end-stop failure by 60% according to our internal data. If you can’t see the bartacks, the bag isn’t built for commercial use.
- Lateral pull strength: ASTM D2061 test minimum should be 50 lbs. Our #10 metal zippers with double bartack consistently exceed that. When a mover overstuffs a bag and drags it, the lateral force on the zipper can spike to 40+ lbs. A 50-lb threshold gives you a real safety margin.
- Fabric substrate: Zipper tape tears because the surrounding fabric gives way. 600D or 900D polyester with PVC coating prevents the tape from pulling through the bag wall. The coating also resists abrasion that would otherwise fray the stitching around the zipper.
Conclusion
Zipper failure drives up TCO through repair costs and lost labor time. Factory tests confirm that bags with #10 metal zippers and double bartack stitching withstand lateral stress 2.6x longer than standard #5 nylon versions. Upgrading to industrial-grade construction cuts replacement frequency and protects your reputation.
Frequently Asked Questions
How to fix a heavy duty zipper?
Replace the broken slider with a #10 metal unit. A temporary FixnZip slider costs $2 and can restore function, but permanent repair requires a new slider and reinforcing the end stops. For permanent fix, upgrade to a #10 metal slider.
What number is a heavy duty zipper?
A true heavy duty zipper is size #10 in metal. Budget moving bags use #5 nylon which fails at 22 lbs lateral force, while #10 metal withstands 58 lbs. Specify #10 metal zippers for industrial use.
How to replace a broken zipper on a bag?
Cut out the old zipper and sew in a new #10 metal zipper, but professional labor runs $20–$40 per bag. For bulk operations, buying a new premium bag with reinforced zippers is often cheaper. Evaluate repair vs replacement based on bag value.
How to fix a zipper pull that came off on a bag?
If the slider is intact, use a fork to open the slider slightly and snap it back onto the zipper teeth. If the slider is broken, replace it with a matching size—#10 metal. Use fork for quick fix; replace slider if damaged.
How to get zipper back on track with fork?
Insert the fork’s tines into the zipper teeth above the slider to straighten them, then slide the pull back onto the track. This works only for misalignment, not broken teeth or worn sliders. Fork trick for misalignment only; otherwise replace parts.


0 Comments