




Custom tote bag hardware comes in four families: zippers, snaps, buckles, and cord hardware. The right mix is decided by closure function first, fabric weight second, and cost per unit third. A work tote that carries a laptop needs a locking zipper and tested slider strength; a market tote needs no closure at all; a gym tote needs a drawcord with a stopper that survives 500 openings. This guide maps each family to the decisions in your tech pack, with the test methods that keep hardware failures out of retail.
Hardware failures read as product failures to the customer. A slider that jams on a $12 tote, a snap that pops on the first use, a buckle that cracks in winter weather, each one converts a small cost line into returns and bad reviews. The fix is specification before sampling: name the hardware, the finish, and the test in the tech pack, then verify on the pre-production sample. The steps below follow the order a factory actually builds the bag, from the opening down to the cords.
Zippers: Slider Types, Chain Width, and the Strength Tests
The zipper decision has three parts: chain construction, slider type, and test method. Chain construction comes in metal teeth, nylon coil, and molded plastic. Metal teeth carry heavy loads and look premium, but they weigh more and can snag knits. Nylon coil is flexible and quiet, which suits totes that fold flat. Molded plastic is the lightest and cheapest, and it wears fastest on bags that get stuffed full.
The slider type determines how the zipper behaves in use. Auto-lock sliders hold the zipper in place when released, which is what a work tote needs. Non-lock sliders slide freely, acceptable for pockets that rarely open. Pin-lock sliders lock into the box at the bottom, used on two-way and detachable configurations. The slider, not the chain, is the part that fails first on retail totes, so the spec must name the slider type and the puller style.
Strength claims on zippers need a test method behind them. The reference standard for the bag trade is ASTM D2061, the Standard Test Methods for Strength Tests for Zippers, published by ASTM International. It covers slider lock holding strength, resistance to pull-off of the slider pull, angular pull-off, and holding strength of separable units, among other methods. When a supplier says the zipper is strong, ask which D2061 method was run and for the report. The retail benchmark discussed in our zipper tensile force guide sits around 50 pounds for tote applications, so require a tested number in that range on the spec sheet.

Snaps: Cap Size, Attachment, and Load Behavior
Snaps close pockets, flaps, and outer compartments. The two families are spring snaps and magnetic snaps. Spring snaps use a post and socket that click together; they hold under tension and release with a pull. Magnetic snaps align themselves, which is convenient, but they release under shear loads, so a heavy tote swinging by its flap can pop a magnetic snap open.

Attachment method matters as much as the snap itself. Sew-on snaps go through fabric and are held by stitching; prong snaps are crimped through the material with a die. Prong attachment is faster in production and holds better on dense canvas and woven PP, while sew-on snaps work on liners and thin fabric where a prong would tear through. Specify the cap diameter and the finish in the tech pack, and match the snap size to the fabric: a heavyweight canvas tote needs a larger cap and stronger spring than a lightweight liner pocket.
Buckles and Sliders: Webbing Width and Release Mechanisms
Buckles appear on totes with straps, closures, or compression features. Side-release buckles are the workhorse: two halves that click together and release by pressing the wings. Ladderlock sliders adjust strap length and hold webbing without buckles, and D-rings anchor straps or hardware like carabiners. Triglides route webbing back on itself and are the cheapest adjustment hardware.
The critical spec is webbing width. Buckles and sliders are sized to the strap: a 1-inch strap takes a 1-inch buckle, a 1.5-inch strap takes a 1.5-inch buckle, and mixing widths is the most common sampling error. Material choice splits between plastic and metal. Plastic buckles are light, cheap, and wash-safe, but nylon and acetal parts can crack in cold weather, so outdoor and winter programs should specify cold-impact tested parts. Metal buckles carry more load and read premium, but add weight and can scratch table surfaces when the bag is set down.
Cord Hardware: Stoppers, Grommets, and Drawcord Routes
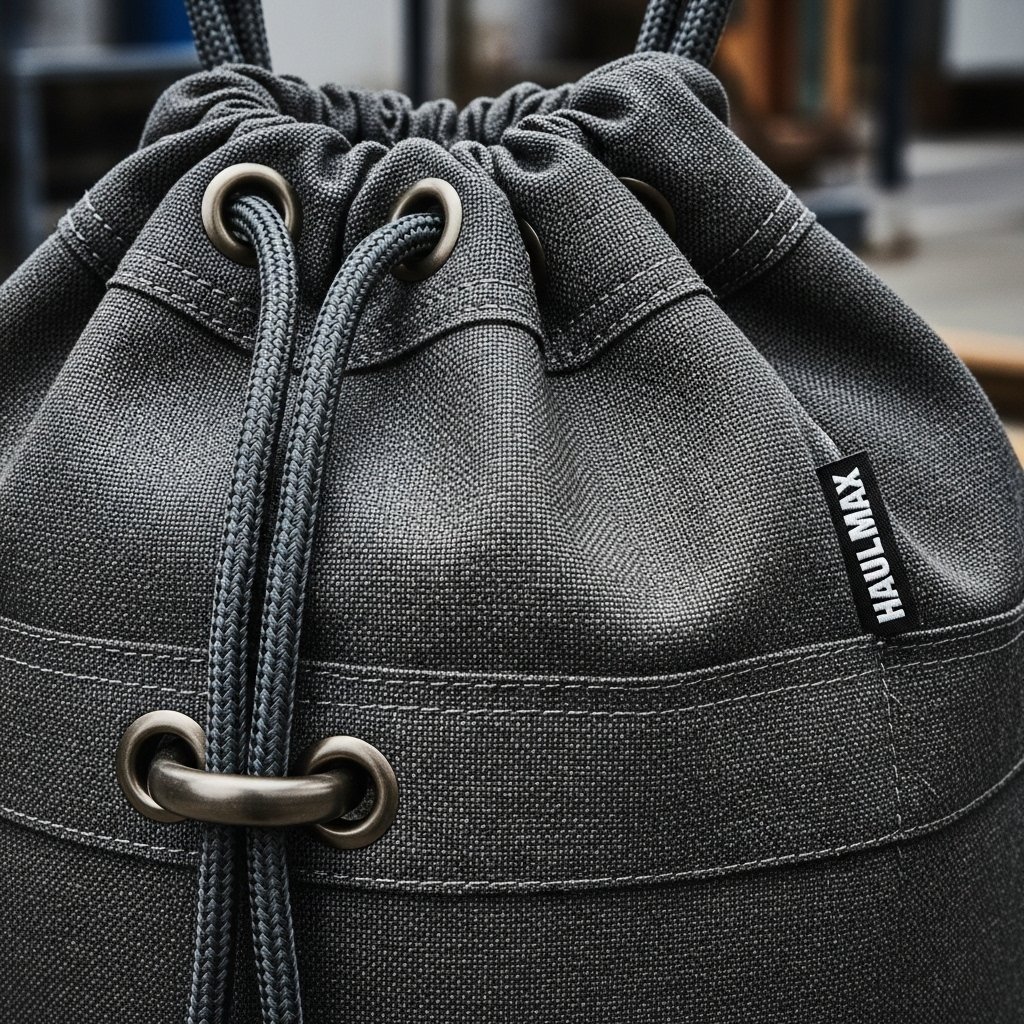
Cord closures need four parts to work over hundreds of openings: the cord, the channel it runs through, the grommet or eyelet at the exit, and the stopper. The grommet protects the fabric where the cord exits, so it must be sized to the cord diameter, not chosen by looks. Cord stoppers come in spring-loaded and cord-lock styles; the spring-loaded toggle grips the cord at any point, while a cord lock uses a barrel with a button.
Failures concentrate in two places. The first is the grommet tearing out of lightweight fabric, which happens when the hole is punched too close to the seam. The second is the stopper slipping on smooth cord, which happens when the stopper’s grip is rated for a thicker cord than the one in the bag. Verify both on the sample: run 100 openings on the pre-production bag and watch where the cord frays and where the grommet sits. For printed totes, the hardware decision interacts with the decoration plan, so review the printing method comparison before locking a metal finish that could scratch artwork.
Writing Hardware Into the Tech Pack
Every hardware piece belongs in the tech pack as a row, not a mention. The row carries the part name, the material, the size, the finish, the attachment method, and the test method. A zipper row, for example, reads: nylon coil chain, 5mm teeth, auto-lock slider, matte black finish, tape width 20mm, tested to ASTM D2061 slider lock method. A snap row reads: prong spring snap, 18mm cap, nickel finish, attach through outer and lining, 12 positions per bag.
| Hardware | Spec Fields | Common Failure | Test or Check |
|---|---|---|---|
| Zipper | Chain type, slider type, tape width, finish | Slider jam, pull break | ASTM D2061 slider lock and pull-off |
| Snap | Cap diameter, spring vs magnetic, sew-on vs prong | Pop open, tear-out | Cycle test on pre-production sample |
| Buckle | Webbing width, plastic vs metal, release type | Cracking in cold, width mismatch | Cold-impact check, width gauge |
| Cord hardware | Cord diameter, grommet ID, stopper grip range | Stopper slip, grommet tear-out | 100-opening test on sample |
Les bag tech pack guide covers the drawing and construction notes that carry these hardware rows, including stitch specifications at the attachment points. Hardware placement should also follow the same discipline as print placement, because a grommet can land inside the print zone and complicate the artwork file. Map hardware positions on the flat pattern drawing, then let the sample verify.
Hardware Checks at Incoming QC
Hardware failures surface at retail, so the cheapest place to catch them is the incoming inspection at your warehouse, before the totes go to stores. Four checks catch the majority of closure defects. First, the finish check: hold pieces under direct light and look for tarnish, plating flaking, and mold lines on plastic parts, because finish defects are the visible failure customers photograph. Second, the function check: run each zipper 20 open-close cycles, each snap 10 click-release cycles, and each stopper 10 pulls on the cord, and log any jam, pop, or slip. Third, the dimension check: measure a sample of chain widths, cap diameters, and grommet IDs against the tech pack rows, because a factory substitution from 20mm to 18mm tape is invisible until a zipper seam puckers. Fourth, the placement check: confirm every hardware position matches the flat pattern drawing, especially grommets that must clear the print zone.
Sample size follows the same logic as the rest of the QC plan: inspect a representative sample from each carton group rather than one bag from the top of the first carton, because hardware batches can vary by production day. Ask the factory for the hardware supplier’s material declaration with the inspection report, so the finish and the plating content are documented, not assumed. A tote program with a tested closure spec and a documented hardware file is the one that does not generate return emails six months after the order lands.
Cost and MOQ Implications of Hardware Choices
Hardware is a per-unit cost line, and the spread between economy and custom pieces is real. Standard plastic buckles and stoppers are the cheapest option and carry no tooling. Metal finishes cost more per unit, and finishes that require a coating process, such as antique brass or gunmetal, can add to the piece price. Logo hardware, such as a zipper pull stamped with your mark or a snap cap engraved with a monogram, adds tooling cost and a separate minimum, so it belongs in the tooling line of the quote, not the per-unit line.
Ask the factory to price hardware separately in the RFQ. A quote that buries hardware in the unit price hides the comparison: one factory may quote standard plastic where another quotes metal, and the prices look similar. With hardware itemized, the logo placement and finish decisions stay visible, and the sample order reflects the real production spec. TIIOCTI sources hardware as part of the custom canvas tote program, with free pre-production samples that carry the actual hardware, not substitutes.
Conclusion
Zipper, snap, buckle, and cord hardware each answer a different closure question, and each must be specified by name, size, finish, and test method. Start with function: does the bag need to secure contents, hold shape, or adjust length? Then match the hardware family, write the rows into the tech pack, and verify on the pre-production sample with cycle tests. ASTM D2061 covers the zipper strength side, and a 100-opening test catches the stopper and grommet failures no standard covers.
Send your tote sketch and target price to TIIOCTI for a hardware quote with the per-unit lines itemized. The sample order includes your selected hardware, and the factory confirms the spec before bulk production starts.
Zipper, snap, buckle, and cord lines priced separately on the sample.
Questions fréquemment posées
Quelles sont les options de finitions disponibles pour les sacs fourre-tout personnalisés ?
Zippers, snaps, buckles, sliders, D-rings, cord stoppers, and grommets are the standard closure and attachment hardware for custom totes. The right mix depends on the tote’s function: a work tote needs a locking zipper, a market tote usually needs none, and a backpack-style tote needs drawcord and stopper hardware.
Comment spécifier une fermeture à glissière dans un cahier des charges technique de sac ?
Précisez la largeur de la chaîne et du ruban, le type de curseur (à verrouillage automatique, sans verrouillage ou à goupille), la finition et la méthode d'essai. La norme ASTM D2061 couvre les essais de résistance des fermetures à glissière, notamment la résistance du verrouillage du curseur et la résistance à l'arrachement du curseur ; veuillez donc y faire référence dans le cahier des charges.
Quel matériel résiste au lavage en machine ?
Les accessoires en plastique et en nylon résistent généralement au lavage, tandis que les finitions métalliques peuvent se ternir ou rouiller au fil des cycles de lavage répétés. Si le sac est muni d'une étiquette d'entretien, vérifiez la compatibilité de la finition des accessoires avec les instructions d'entretien avant la production.
Les accessoires métalliques entraînent-ils un surcoût pour une commande de sacs fourre-tout ?
Oui. Les accessoires constituent un poste de coût unitaire, et les finitions personnalisées, les tirettes de fermeture éclair avec logo ou les boutons-pression gravés entraînent des frais d'outillage et des quantités minimales. Demandez à l'usine de chiffrer les accessoires séparément dans l'appel d'offres afin que la comparaison entre les fournisseurs reste claire.
Dans quels cas vaut-il mieux équiper un sac fourre-tout d'une fermeture à glissière plutôt que d'un bouton-pression ?
Use a zipper when the contents need protection from loss or weather, and a snap when the closure is mostly about keeping the bag’s shape. Snaps cost less per unit but do not secure contents, so pick by function, not by price. Beyond hardware, hang tags and inserts complete the retail presentation.


0 commentaires